Felicia Day did a paperback book tour in late April 2016 for her New York Times bestselling book, You’re Never Weird on the Internet (Almost). During her Denver stop I gave her a drawing I’d been working on for several months. This post details the process of how I created it.
If you aren’t interested in all the blah-blah and just want to get a better view of the finished drawing, you can skip to the bottom.
Research Phase
As soon as I finished the last chapter of Felicia’s book back in August 2015 I felt I needed to express my gratitude and admiration. Not just for her inspiring book, but for the many years I’ve been a fan and how much she’s done to make being a geek a thing to celebrate. As is a common story for so many, growing up geeky was hard for me. Unfortunately, I learned to hide that part of myself, and I made myself pretty unhappy in the process. People like Felicia helped me peel back a lot of that “nerd shame” and embrace that part of myself.
I could write a letter, but I often find words limiting. You take a feeling and distill it into sentences and realize you’ve read these same trite words before, and there’s no impact behind them. I decided instead to create a gift.
I wanted to make something really unique and hopefully something that would be special to her. I could draw a picture of her, but I know she has no shortage of those. That would be very special for me to make, but I wanted to give her something that might be special for her. Maybe even something she’d like even if it hadn’t come from a fan. Ambitious goal probably, but it’s better to aim high and miss… and some analogy about moons and stars or something.
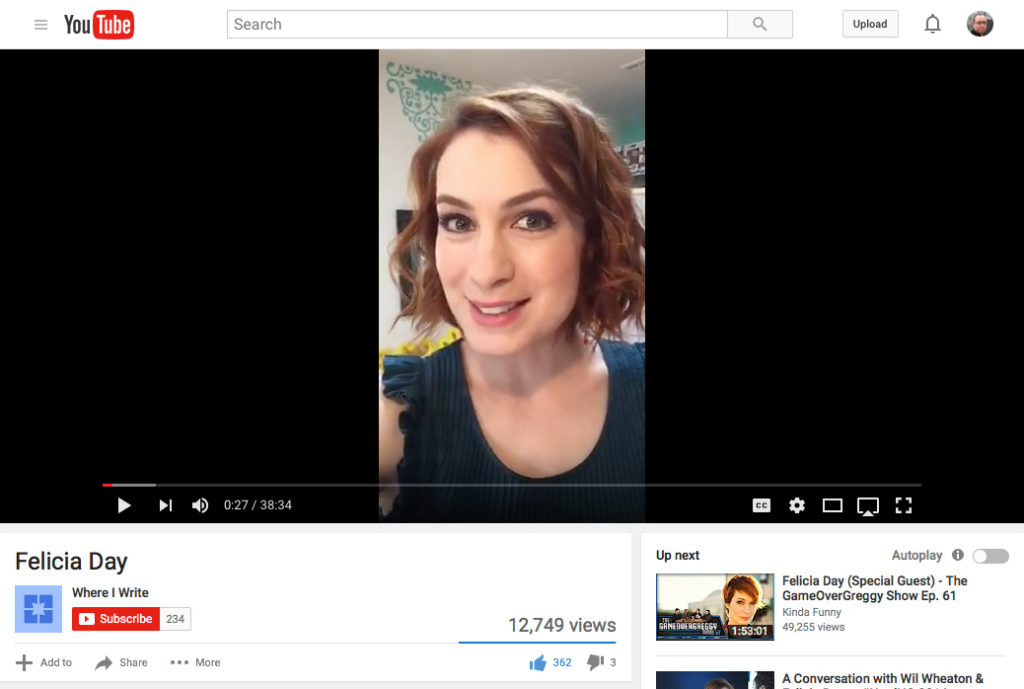
I had seen her “Where I Write” Periscope a few months prior. In it she gives a tour of her converted garage home office over the course of about half an hour, showing everything in it. The idea percolated up that I could recreate her office. It’s where she shot scenes from The Guild, episodes of Co-optitude and The Flog, and it’s where she wrote her book (among many other things I’m sure). In a few years she’ll probably move on and be living in some huge mansion or something, so maybe I could memorialize this cradle of creativity that was part of her tremendous rise to success.
My idea didn’t start out as a drawing. It was going to be something far different, but still based on her garage. So although the research phase lasted four months, it wasn’t four solid months of just researching how to do a drawing. There was a lot of iterating and concepts and trying things and failing and despairing and holidays and other distractions.
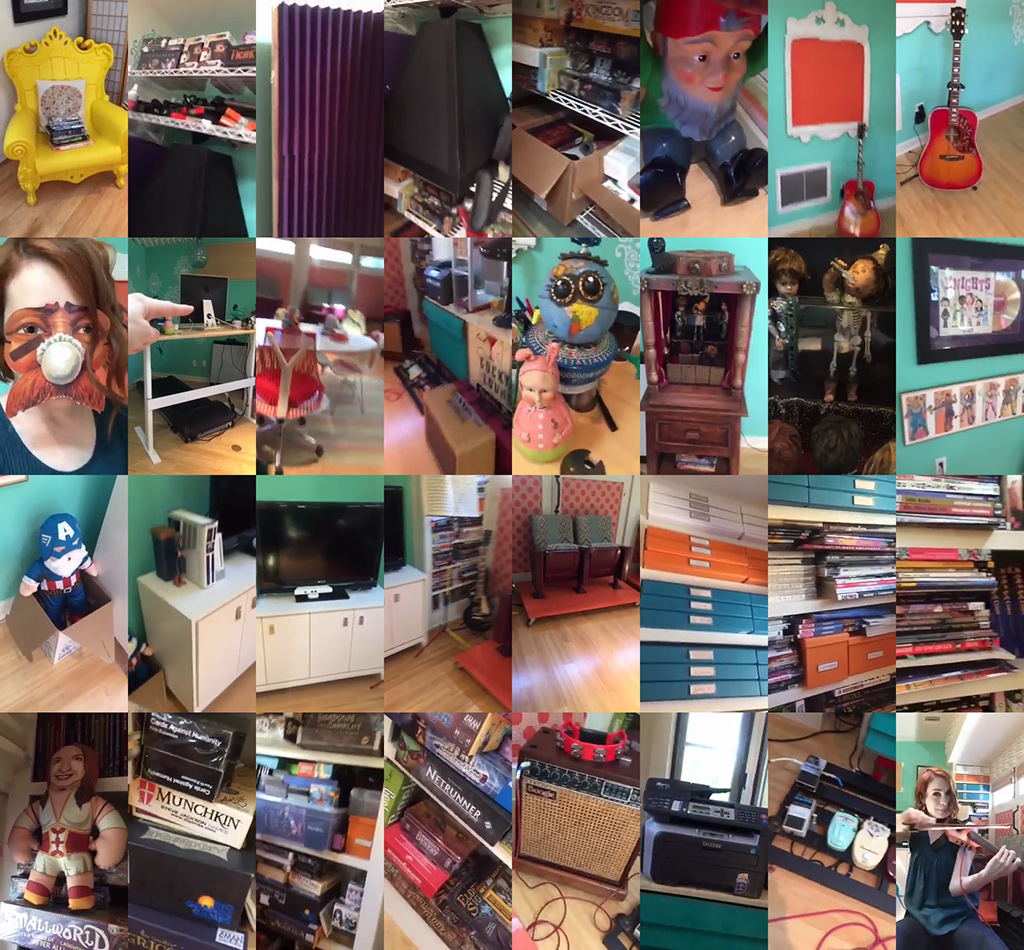
However, by the end of 2015 I had a ton of detailed info figured out about her office. About 95% of that info came from watching that Periscope over… and over… and over… and over… and over. Frame by frame. Screenshot after screenshot. Scrubbing through hoping to catch a glimpse of that one piece of furniture I couldn’t get a clear shot of, almost catching it, and then lamenting as the camera panned over to something else. Where the Periscope failed I could sometimes get a different angle from a Co-optitude episode or photo.
If you aren’t familiar with Periscope, it’s not meant for high-fidelity video. The footage is tiny (208×386 pixels), very lossy, and in portrait orientation. Also there’s a big pretty Felicia face in the way of much of it, which I adore but which is also opaque. So it was a challenge.
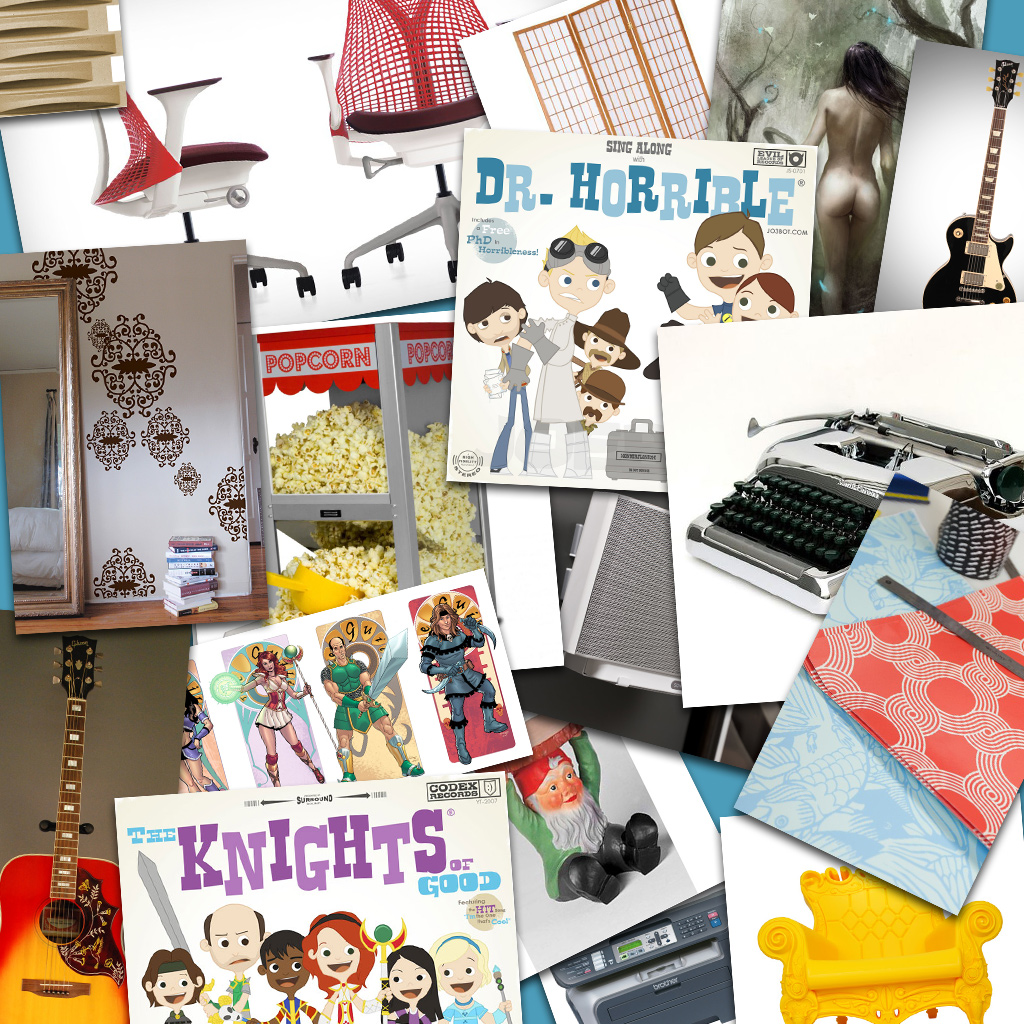
I wanted to do everything as precisely as possible, so to get dimensions and better views of things I tried to research as many objects as possible. Although there are a few one-of-a-kind things in her office, most were bought from stores, and with a little research you can figure out where they came from and get the necessary details about proportions and in some cases even get really excellent hi-res photos from every angle.
Why yes, I did feel a little creepy during this phase. Benevolently creepy. But, yes, still: creepy. Sorry. 🙁
I’d say I found over half the furniture. I also found all the art on the walls. Even from blurry, low-res video screenshots Google Images was able to help with a surprising number of them.
For items I couldn’t find, I could use the items I did find to compare. For example, I found the shoji screens online but couldn’t tell which shelves were behind them, but I could see they were a few inches taller than the screens, so I could get a good estimate from that. Using that technique together with building codes standards and common dimensions for a two-car garage I was able to get a good estimate of overall room size.

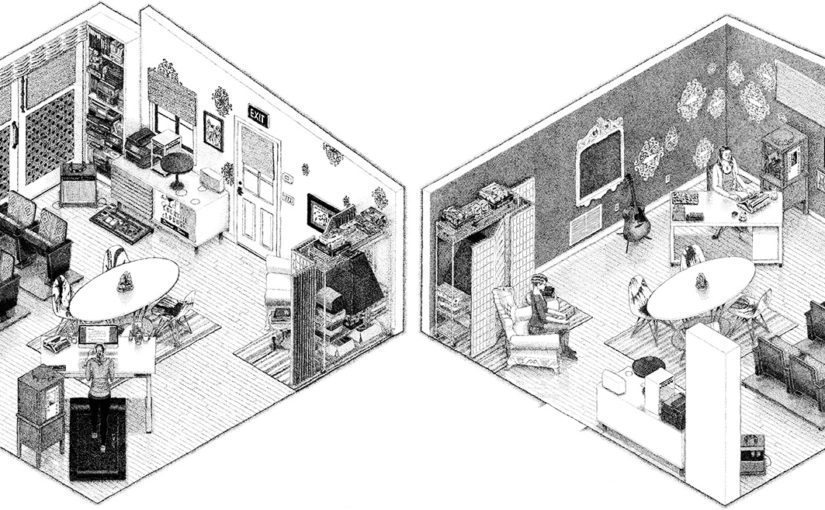
Shortly after New Years 2016 lying in bed one night, feeling bad that I couldn’t quite figure out how to make this gift work, it dawned on me: an isometric stipple drawing would work well. It would be a big task, but in my wheelhouse. I started work on it the next day.
Design Phase
I already had a rough floorplan in CorelDraw I’d created to play with layout and help me gauge relative proportions.
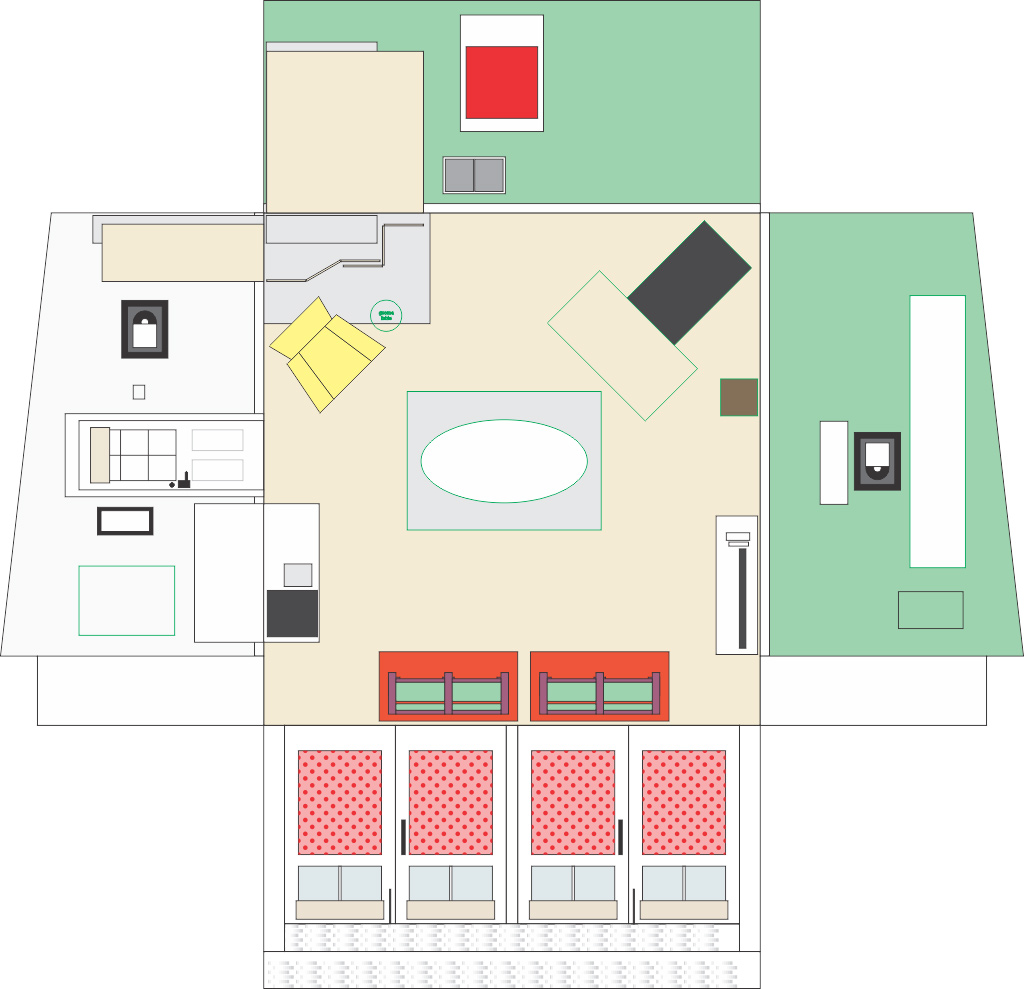
I took that drawing and skewed it to get a very rough idea of the composition I wanted to achieve. I would do two different views of the same room 180 degrees apart. That way I’d get a good view of everything. Later I would realize this also gave me more opportunities for vignettes with Felicia and Ryon.

From there I set about modeling every major object in the room. All the furniture, all the larger objects, and a lot of the smaller ones, too. Though I had a lot of research info, this stage was about 50/50 research/design. For example, maybe I had some overall dimensions of an object but needed better photos to make a precise model.
All of this was done in 2D in CorelDraw. Why didn’t I use fill in the blank with your favorite 3D software? Because I don’t know it. Not well enough to be proficient. Sometimes the best quality a tool can have is to be invisible and second nature. Though I lament I never got good with Illustrator or Blender or other more mainstream tools, I’m extremely proficient with CorelDraw and can use it with my eyes closed. I also took a lot of 2D drafting in school. For me, not thinking about the tools or techniques I’m using can be more valuable than doing things the exact best, most efficient way. Also, some things are easier to do in 2D than 3D anyway, especially highly irregular shapes. Am I being defensive about this choice? Probably. I’m just trying to head off the inevitable “why didn’t you ___” questions. The answer is I just didn’t!

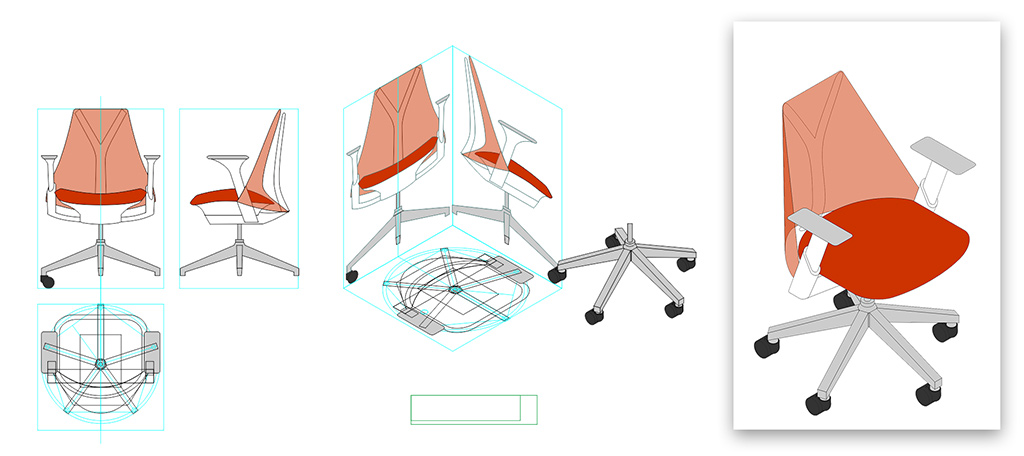
Once I had 2D versions of everything I converted them to isometric. This, again, was all done in 2D. By using clever geometry and skewing/scaling the 2D drawings I made I was able to simulate isometric 3D models of each object. Here’s a progress shot and the final model of a Herman Miller Sayl (SAAAYL!) chair.
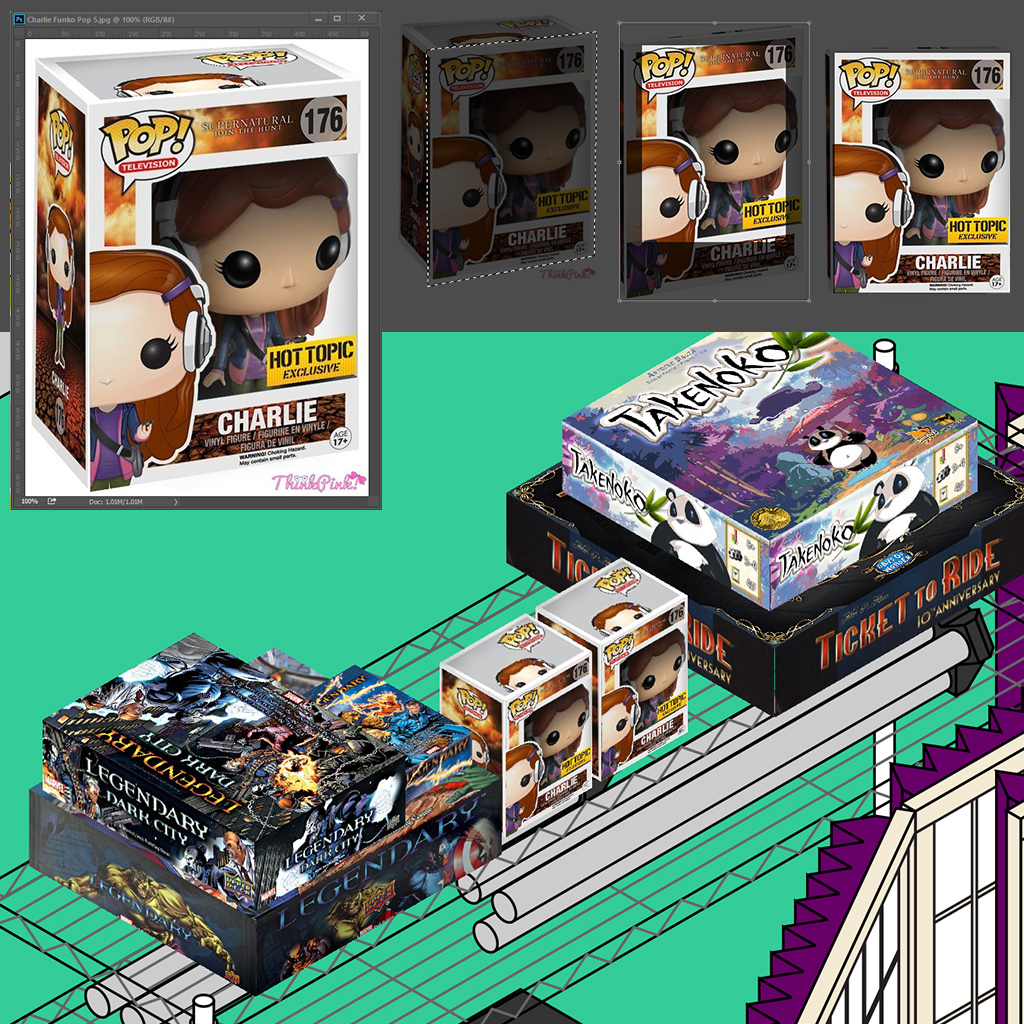
I modeled a lot of the boxes on her shelves. I first had to identify as many games as I could so I could find good images and box dimensions. I then used Photoshop to get the best images I could of each face of the boxes. These were then converted to isometric. Here’s an example of how I took a product photo of the Charlie Funko Pop box, chopped it up, and skewed it into straight images, then converted those to properly scaled and angled isometric box faces.
OK, so at this point, you may have looked at the final stippled drawing and said to yourself, “Oh my god, why did you put this much effort into stuff you can’t even see!?!? That Funko Pop box winds up being like 12 dots! That office chair is almost completely obscured by Felicia and the desk!” Fair question. I… I don’t know. Earlier in the process it wasn’t clear exactly how large any given detail was going to be. I hadn’t settled on a scale yet. Even so, it’s not always clear what details will survive and which ones won’t. Sometimes the tiniest things wind up being perfectly discernible, and other times the coarsest become muddy and indistinct. It’s always easier to start with high detail and lose it than never have it in the first place. Also? …I kinda get off on this stuff. Being incredibly meticulous is meditative. [shrug] I don’t know! I’m a weirdo! This is a fairly harmless weirdo thing! Lemme have my weird thing.
Around the end of February, Felicia announced her paperback book tour, and she’d be coming to Denver! Oh boy, I could give her my drawing in person!
…
Oh no! That means I have to hurry!
I rushed to finish up the design phase a few days into March and finally had a completed isometric computer drawing. The next day I would begin inking. I’d have a little under two months to complete that before the signing. I had no idea if that was enough time.
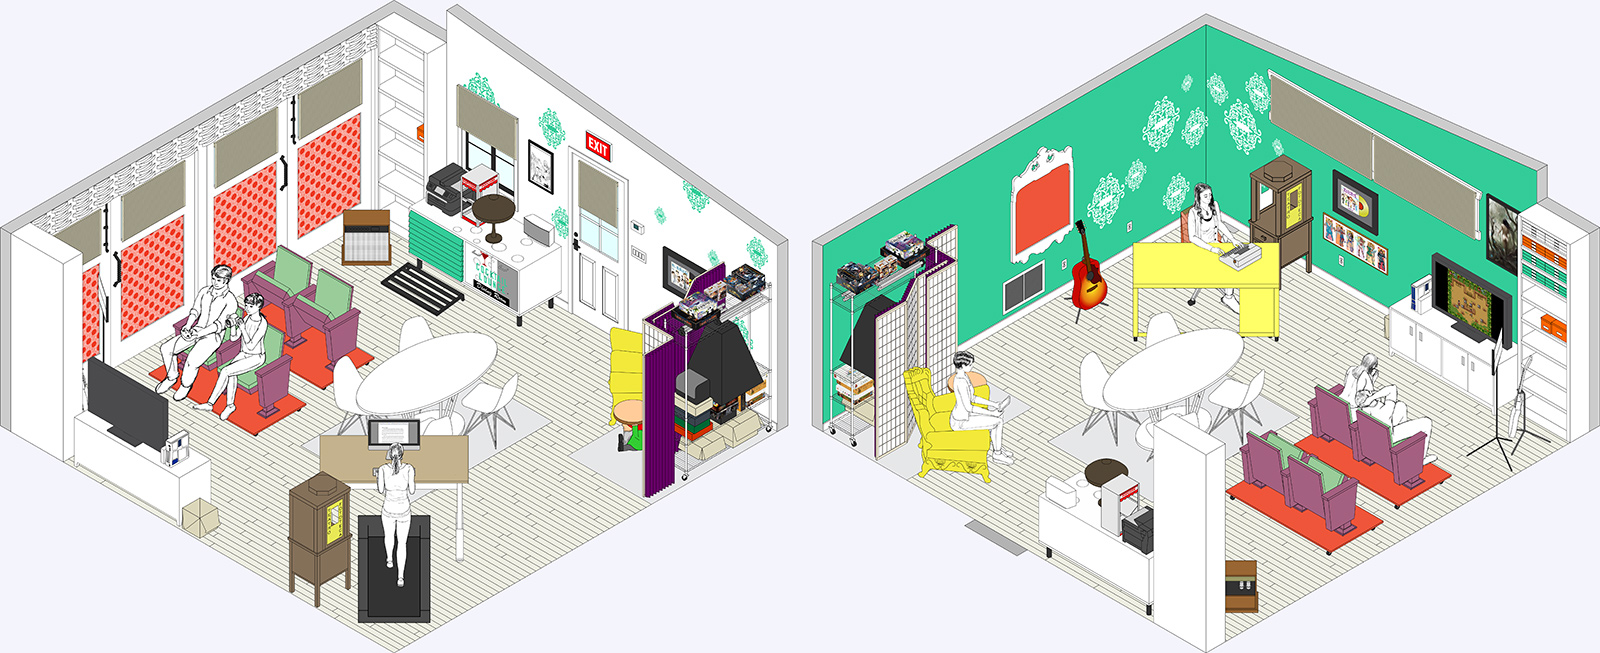
I promptly got rid of all the pretty colors, because this wasn’t the final product. This was intended as just a tracing guide.

Inking Phase
The final computer drawing was not 100% complete. I left some things out. Some things were left as boxy approximations. That’s okay; it was just intended as a tracing guide, and in some places, just to get proportions of an object I’d have to freehand in ink.
I settled on a scale of 1:40, mostly because that’s the largest round-numbered scale I could fit on the size paper I had conveniently available. Much smaller and there wouldn’t be much detail to discern; much larger and I’d be at it for months.
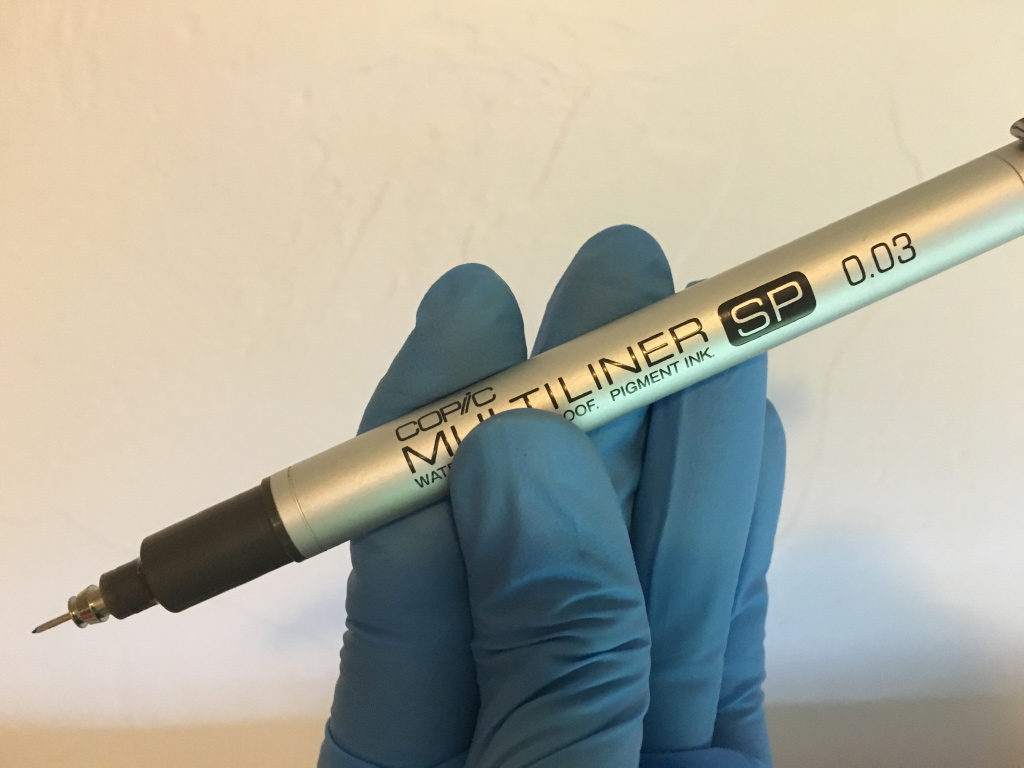
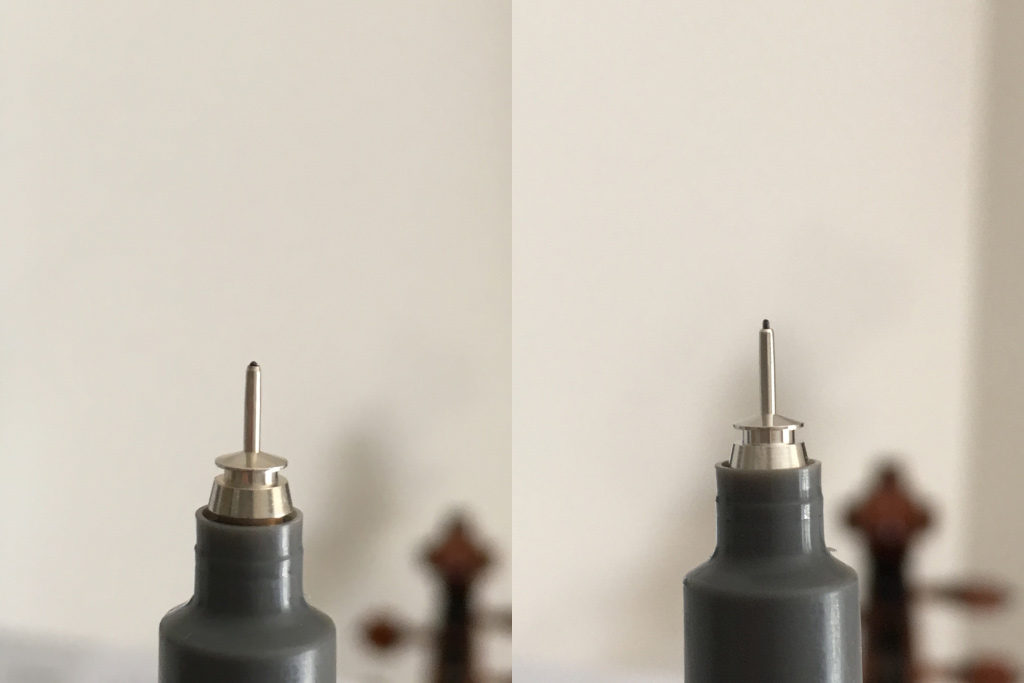
I primarily used a Copic Multiliner SP pen with a 0.03mm (1/1000th inch) nib. I also used a Sakura Pigma Micron 005 (0.2mm), though much less so as I progressed.
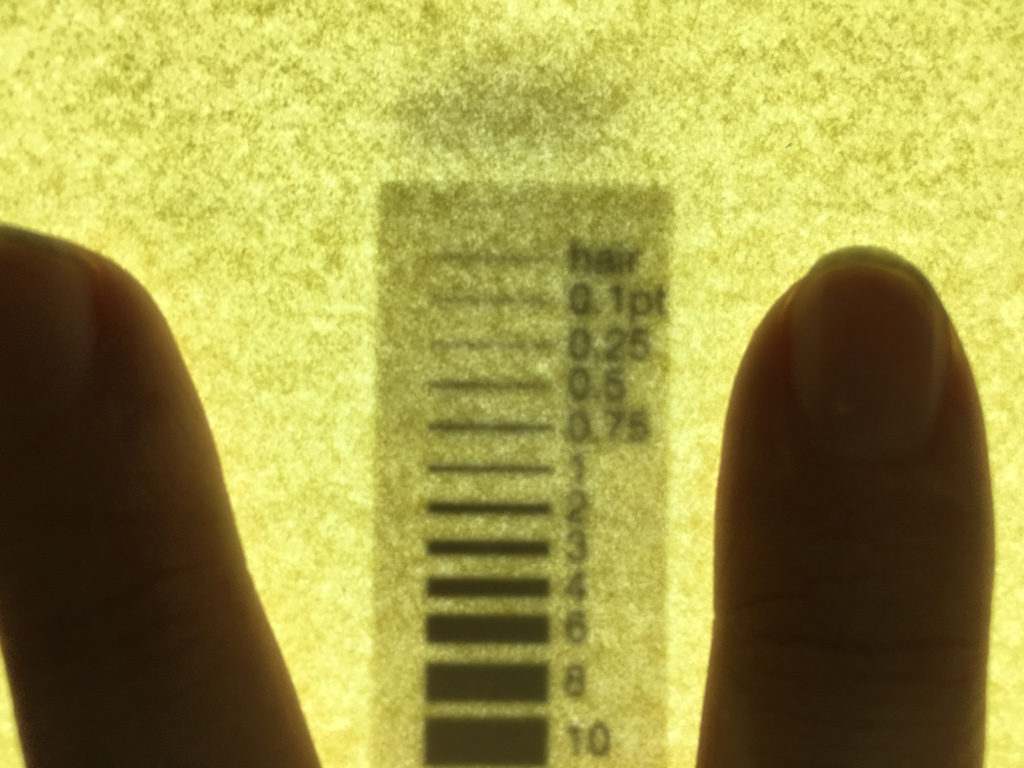
The problem with tracing is the paper scatters the light shining through. Here’s a print test with lines of various point thicknesses. I used this experiment to decide how thick to make the outlines. This also gave me the first taste of how much detail would get lost at scale.
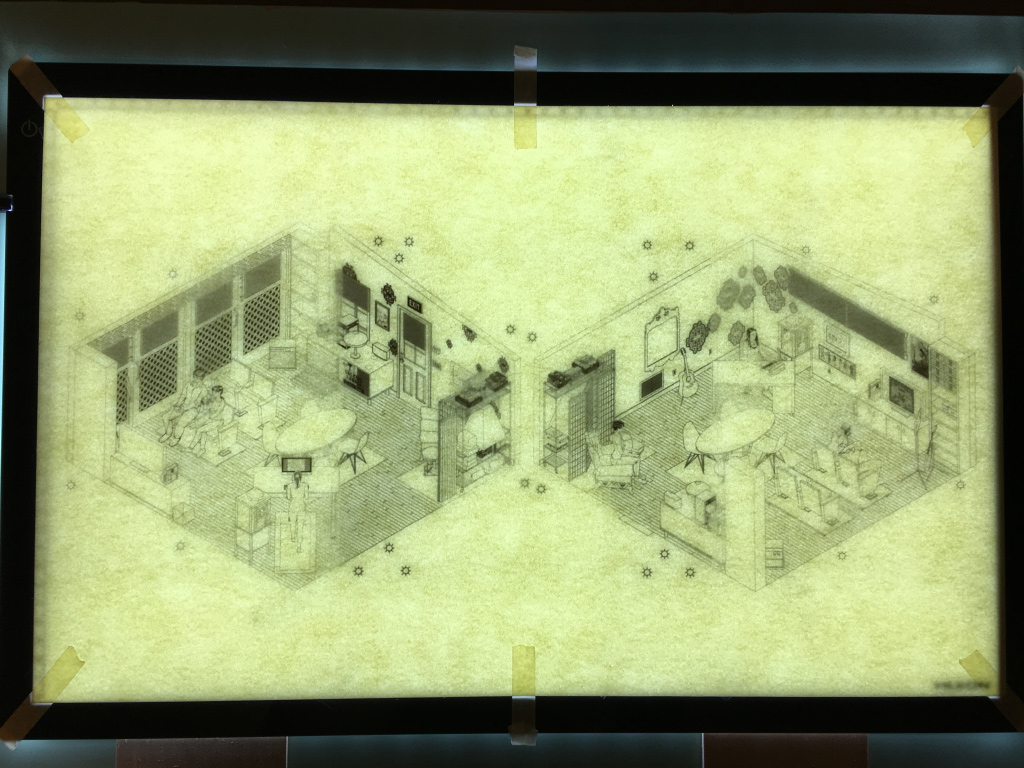
I printed the monochrome drawing out on overhead transparencies and put them on a large A2-sized light table I got just for this project.
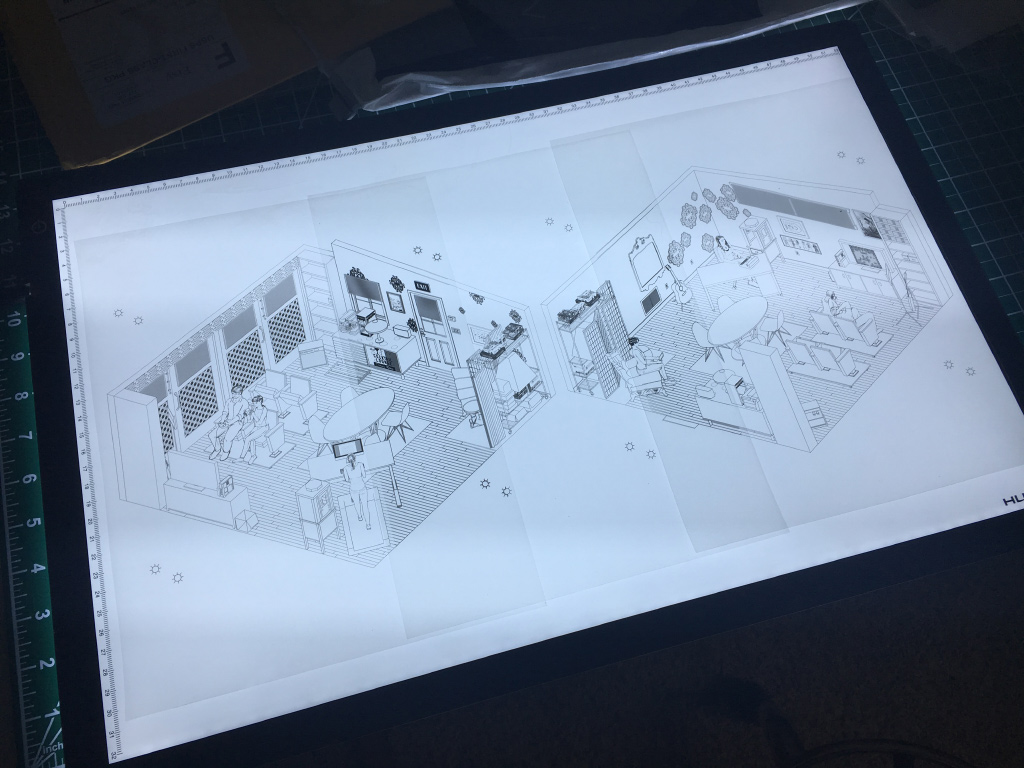
As you can see, the image gets pretty indistinct when filtered through the thick paper.
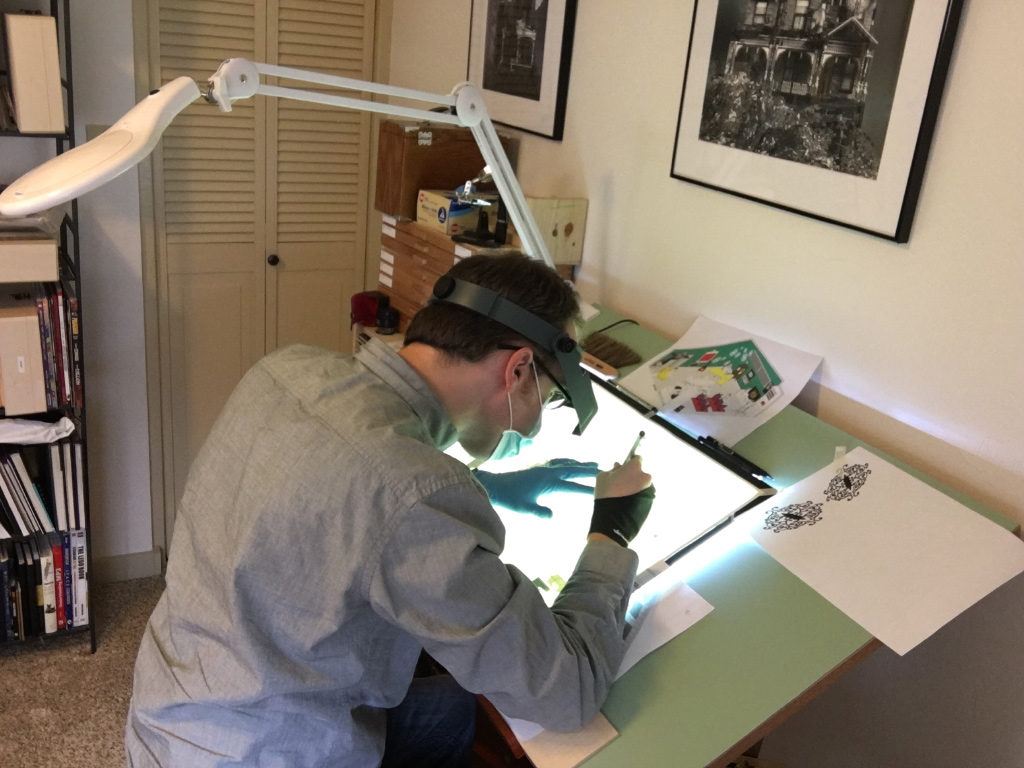
Here’s a view of my desk and tools. You can see my color reference prints tucked underneath. Because of the blurry light table image I often needed to see what it was I was drawing in particularly busy areas where the projected image wasn’t clear.

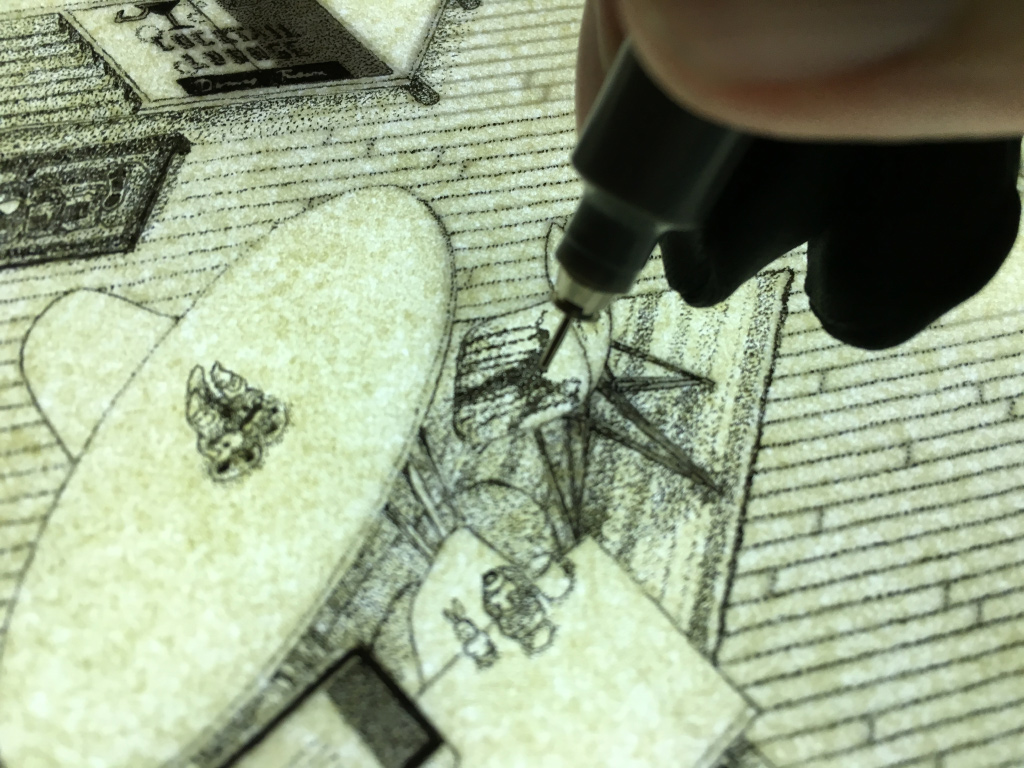
A closeup of drawing some “smol dots”.
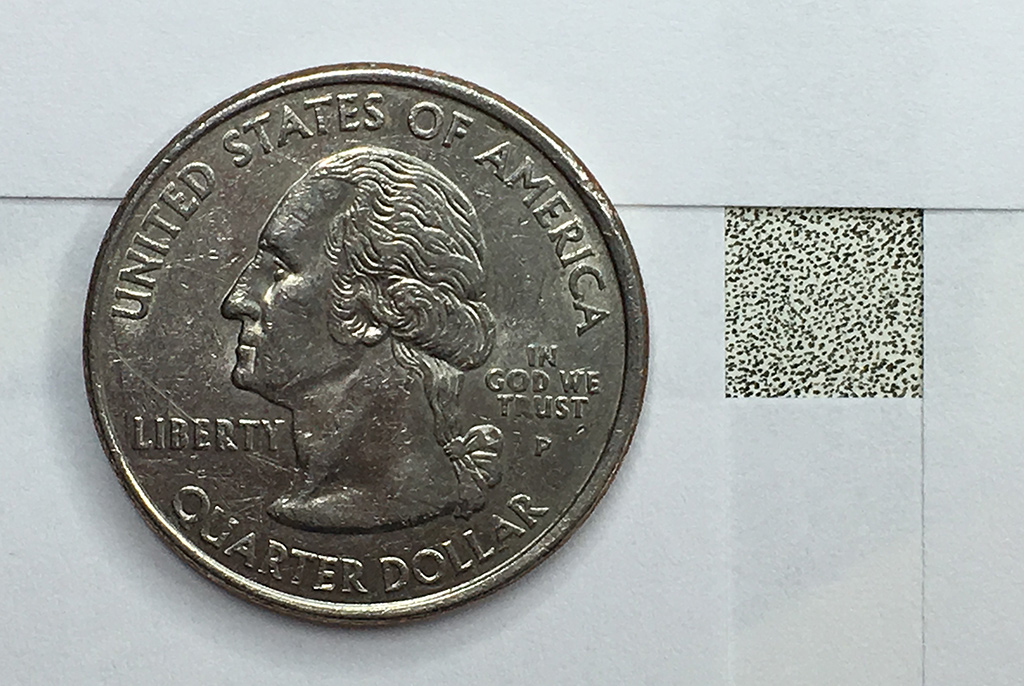
To give a sense of scale of how small the dots are, here’s a patch next to a quarter.
I was hunched over a lot. I enjoy tedium, but it was pretty tedious. Usually about half an hour of this and I’d be ready to stop. However, I was really trying to push through. I didn’t have a sense for how long inking would take, so I wanted to front-load as much of the effort as possible. If I got through a quarter of it in a week then that’d be great, but if it was a month in and I didn’t even have 10% done then that would be bad. I eventually estimated that if I kept up the same breakneck pace the entire time I’d be done with a little bit of time left over. That meant 2-4 hours on week nights, 6-8 hours per day on weekends. That may not sound like a lot, but stippling is really pretty tiring. I wound up using the pomodoro technique to help me schedule regular breaks and stay focused and on schedule.
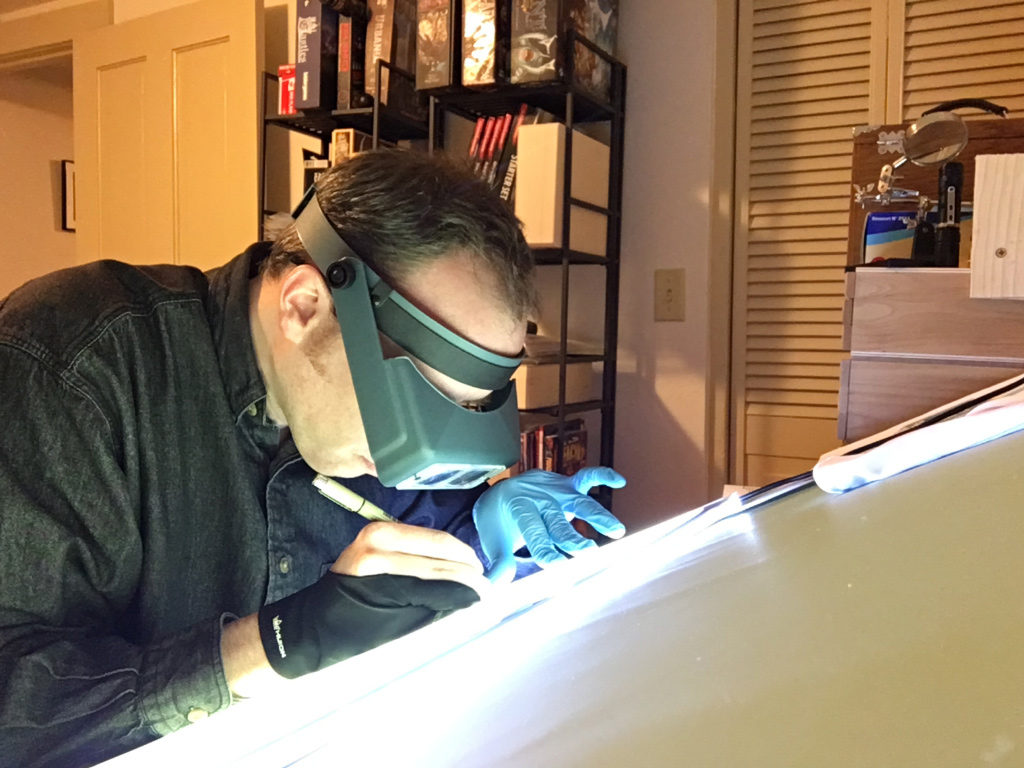
I wore a magnifier visor to see what I was doing. Gloves prevented smudges, oils, and other schmutz. I often wore a surgical mask as well to avoid steaming up the paper or sneezing or otherwise biology-ing on anything. Excessive caution? Yes. Look, I had nightmares about some stupid, avoidable disaster happening at the 99% completion mark. I wasn’t gonna screw around!
About 75% through my pen had been worn down to a nub and I had to replace the tip.
Inking, inking, inking, inking, inking. I took a photo of my progress about every 30-60 minutes and turned it into a short time-lapse video.
Finally! With about a week left before the book signing it was complete! This is a photo of fatigue!
Gifting!
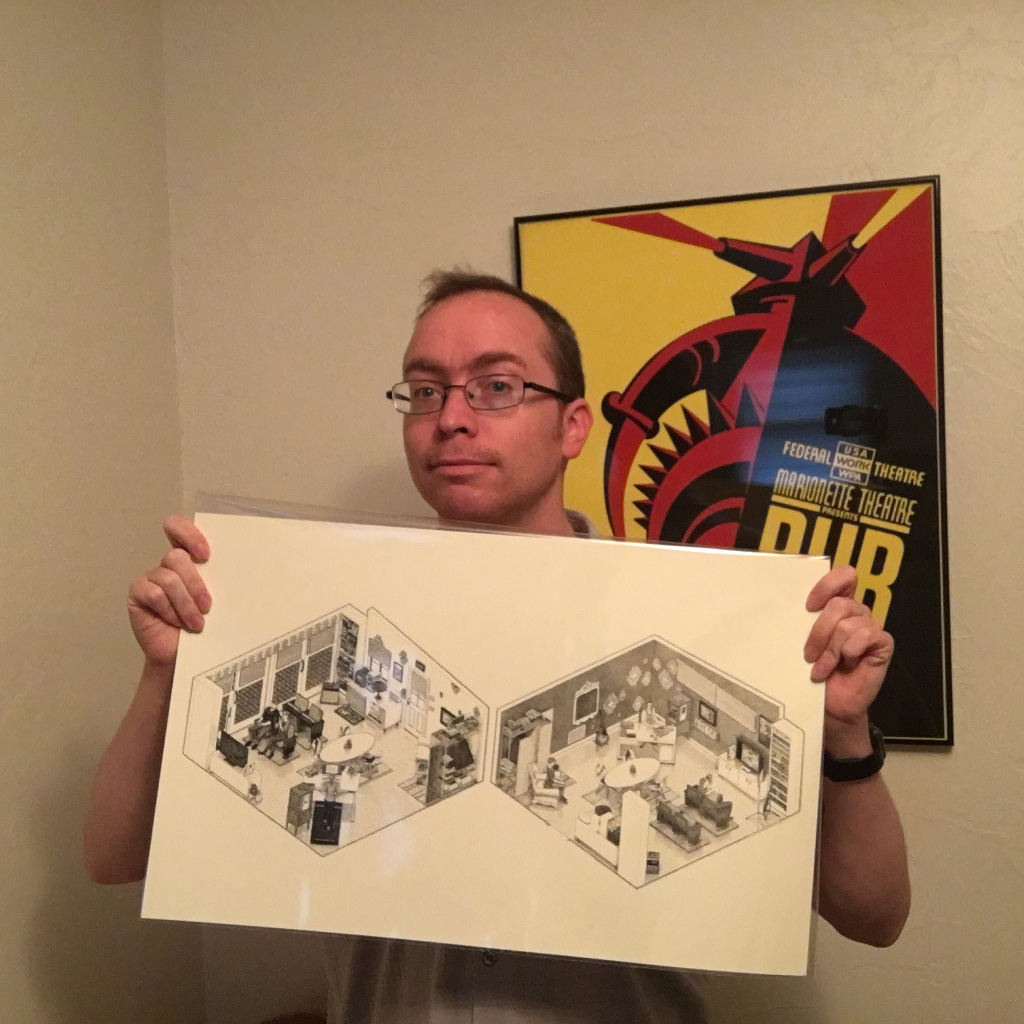
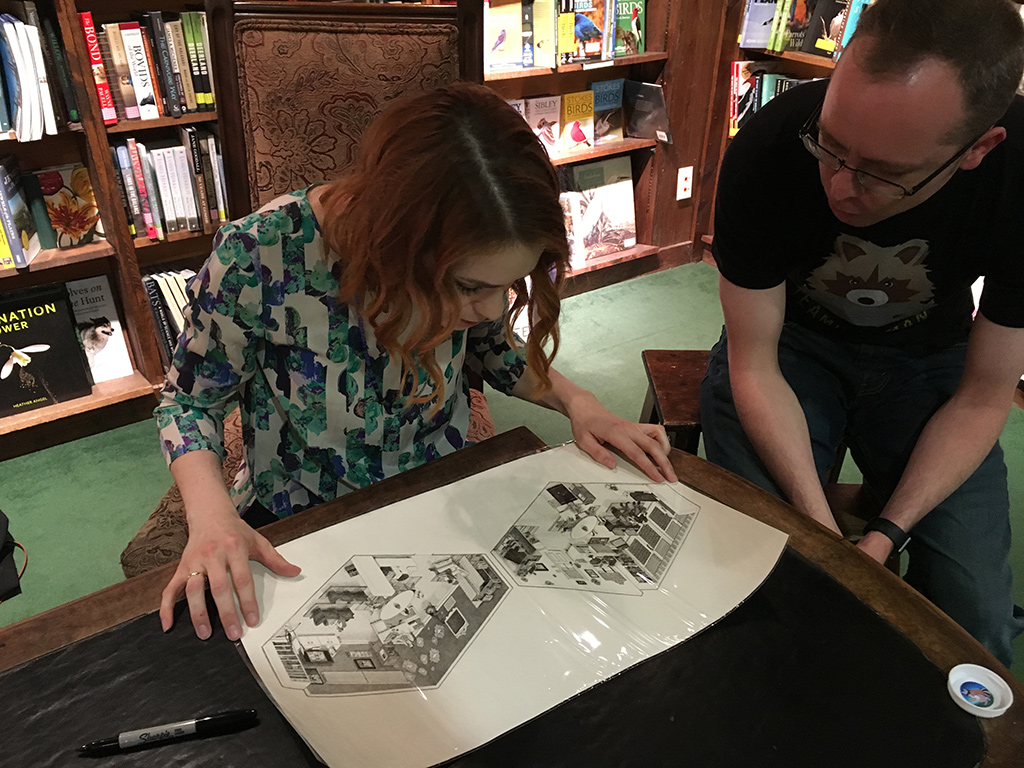
On April 21st I got to give my drawing to Felicia. I knew I’d be nervous and time-constrained, so I wrote a short letter to go along with giving a little background on the significance. She seemed to like it.

I started this project just before meeting Felicia for the first time in Santa Fe and finished it about 8 months later just before meeting her a second time. In that time I joined Team Hooman, an online community of her fans. I was so impressed by how lovely the fans were at her first signing that I was curious to finally find out more about this group I’d heard about. During the course of working on this project I only found more and more things to be grateful to Felicia for. Team Hooman gave me shelter from the snark and negativity of the world and gave me a place to work on becoming the better person I always knew I could be. Felicia’s example of unwavering kindness taught me to be more compassionate, not just to others but to myself. The community’s sense of philanthropy showed me how rewarding it can be to do things for others. I’ve learned this and so much more from Felicia just in the past few months.
Felicia Day has changed my life for the better, again and again and again. I never stop learning from her, and I’m grateful every day that she lets us into her life. It’s humbling to know I’ll never truly be able to repay her for all she’s done for me and so many others, but this project was a small attempt to show what she means to us.
Close-ups
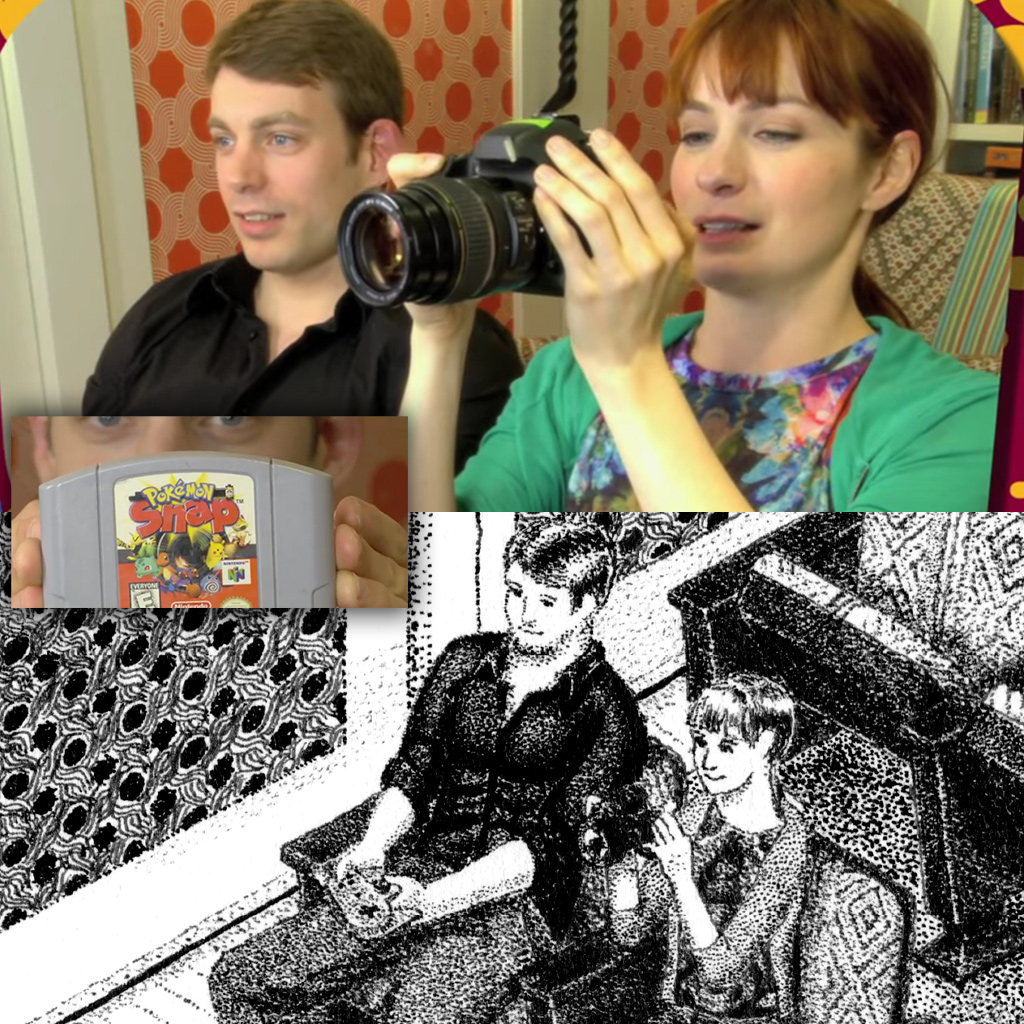
Lastly, here are some close-ups along-side their real-world counterparts where I drew inspiration.
One of my favorite Co-optitude episodes was Pokémon Snap, where they took real and virtual photos of “pokey mans.”
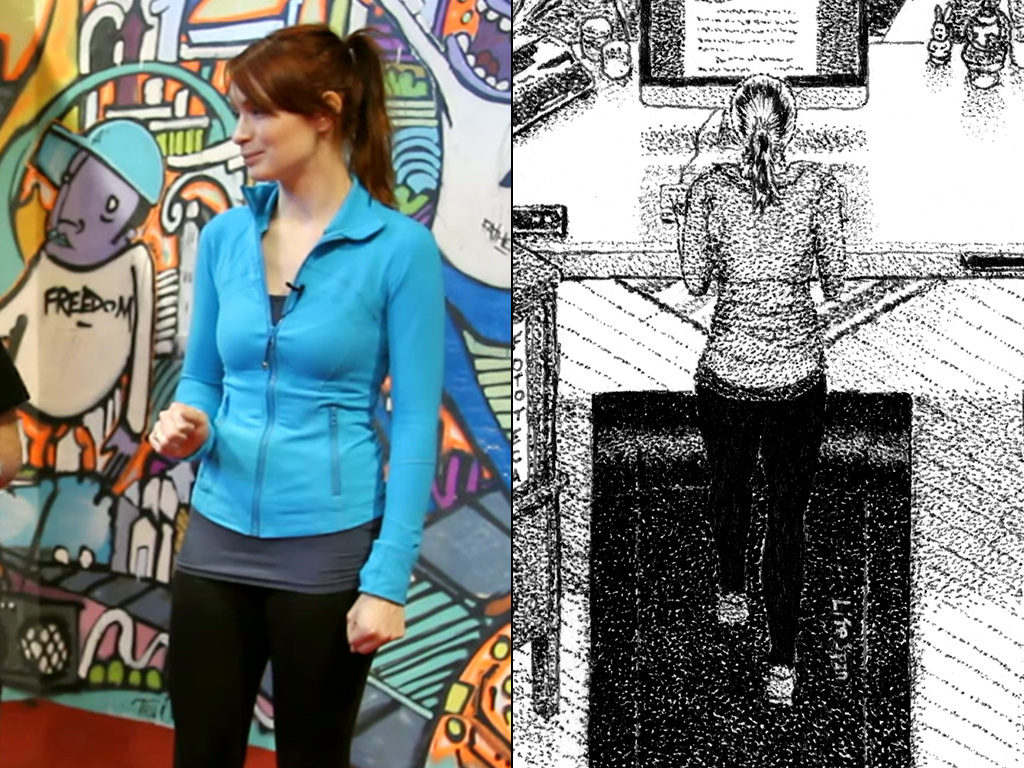
I had Felicia writing her book on her treadmill desk. I went with her blue athletic outfit I’ve seen her wear, such as in the parkour Flog episode.
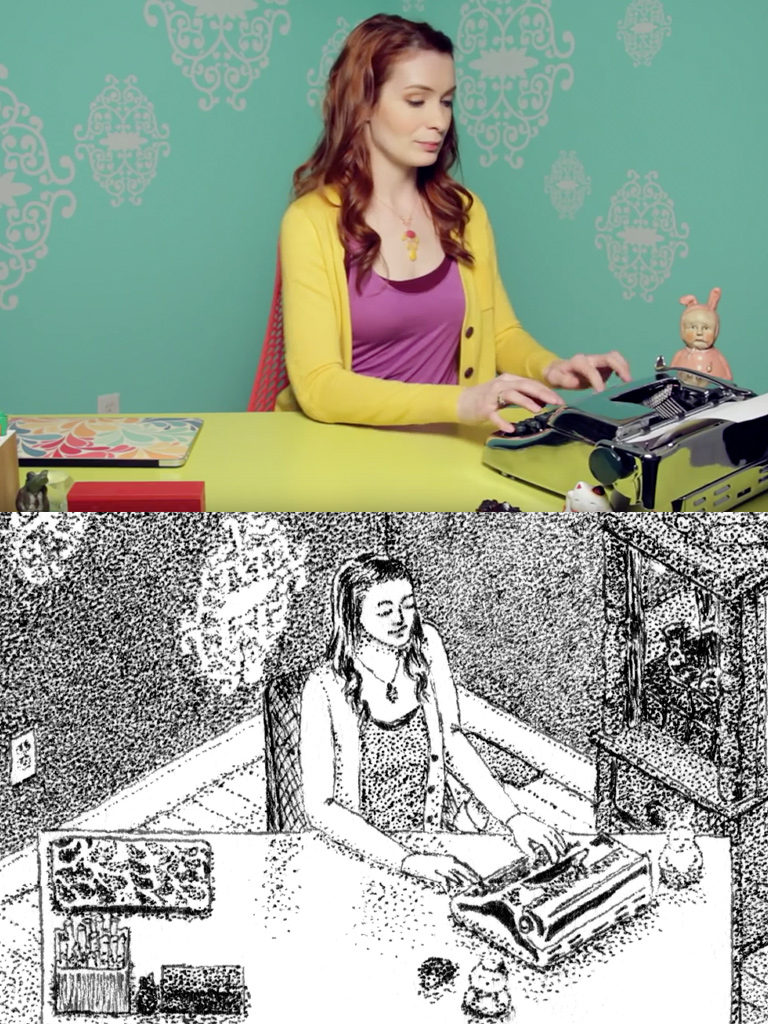
From the other angle, I swapped out the Geek Desk for her older yellow desk and recreated the Question of Note segment from her very first The Flog episode.
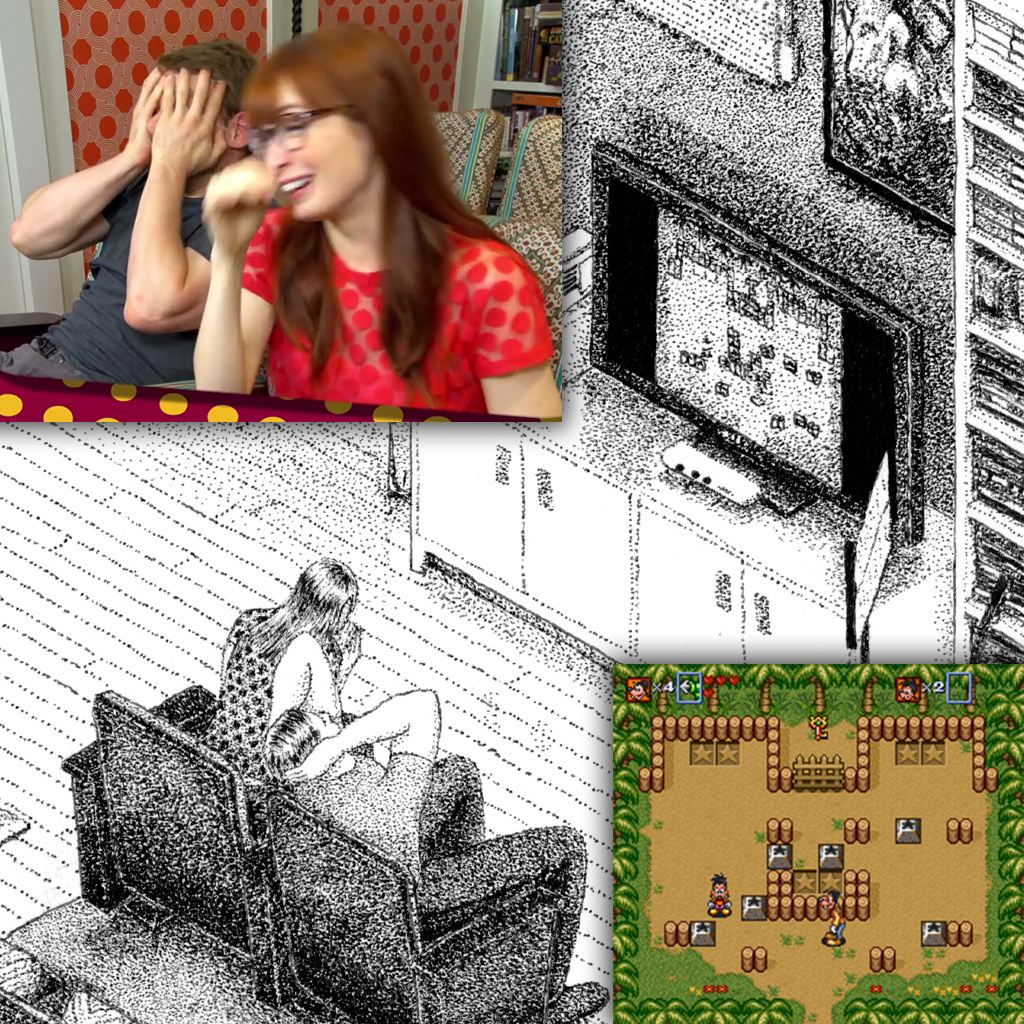
I couldn’t not commemorate one of the most famous Co-optitude episodes of all time, ep 2, Goof Troop. I found a ROM of the game and recreated one of the many scenes in which things go awry.
And just as a small bit of torture, I tried to recreate the crooked wall decal Felicia mentioned ruefully on Instagram.

That’s it! Hope you enjoyed!
